


Installing a Murphy bed can be exciting, but the process can require some careful consideration. Since these beds can turn into different furniture, they may need more finesse than simply sliding them into a room and calling it a day.
At best, a poorly installed Murphy bed may bump into other furniture or make it hard for you to walk around. At worst, it may just fall straight out of the wall and require starting over with the installation process. Before installing your bed, you must prepare the space fully.
With our handy beginner’s checklist on installing a Murphy bed, we’ll ensure you avoid common installation pitfalls so you can enjoy your new bed as soon as possible.
1. Prepare Your Room By Clearing Everything Out
Your first order of business for a wall bed installation is to declutter, then clear out your room. While you may be tempted to keep some of your furniture in place, it’s better to be on the safe side to avoid an accident.
When you move your Murphy bed into the room for the first time, you’ll need space to maneuver and get everything in place. If you’re constantly bumping into side tables or trying to step around ottomans, you could trip and fall.
If you want to save time putting all your furniture and decorations back together, snap a few photos of your room before and after you clear it out. These photos will give you a visual reference so you don’t forget your favorite interior design details.
2. Double-Check Your Wall Stud Structure
When you install your Murphy bed, you can’t simply nail it to any part of the wall. Wall studs provide a firm anchor to keep your bed in place so that you can fold and unfold it safely.
Nailing your Murphy bed outside of a wall stud structure risks the bed sliding out of the wall entirely, putting you at risk for injury. Wall studs are usually spaced around 16 inches apart and are easy to find with the help of a stud finder. These tools use magnets to hone in on the nails and screws hidden beneath the wall.
You also shouldn’t install your bed into any walls made out of plaster. Plaster walls are flimsy and tend to crack under stress, often crumbling off and compromising your bed’s stability. If you don’t have enough studs and need more stability, try installing a plywood backing behind the wall.
Overall, wall mounts are the most popular method of installing a Murphy bed since they provide very little impact on the room’s structure, aside from a few holes in the wall. You can easily reposition or uninstall your bed whenever you feel like it.
3. Evaluate the Floor’s Surface Carefully
If you would rather install a Murphy bed on the floor, double-check that your flooring is up to the task. Hardwood floors sometimes need additional care due to the drilling process, which may cause splinters or structural damage.
Carpeted floors may show less damage, but you’ll likely need to carve out some of the carpet to avoid fraying. It’s worth noting that a floor-mounted option can be difficult to remove once installed, so only consider a floor mount if you plan on using your Murphy bed for a long time.
If you don’t want to damage your flooring, you can also invest in a separate floor base beneath your Murphy bed. This base gives your bed a sturdy foundation to rest on without risking fraying, splinters, or ruined floorboards.
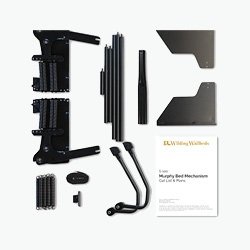
4. Gather Your Installation Tools Ahead of Time
It’s better to stay ready than get ready. Before you install a Murphy bed, create a designated space in the empty room for all of your installation tools.
This step may seem simple, but it gives you both time and space to make sure you’re not missing anything important before getting started. The last thing you want is to realize you’re short a few screws while in the middle of mounting your wall bed, right?
5. Measure Your Clearance Space
Now that you’ve cleared out the room and double-checked important details like structure and tools, a few measurements will set the stage. Your Murphy bed should neatly fit against the wall, ceiling, and floor without colliding or overlapping with anything else.
If you need a visual reference, use tape to create little squares and rectangles around the room where you’ll place your other furniture. This method helps keep the space clear while still showing how your Murphy bed will interact with a finished room.
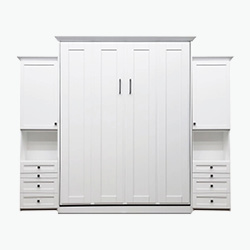
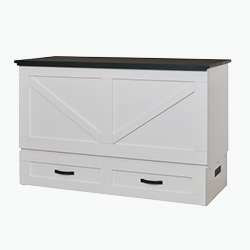
Since Murphy beds can come in the form of desks, bookcases, or sofas, there’s no one-size-fits-all approach when it comes to prep.
Wilding Wallbeds is Your Ultimate Resource for Murphy Bed Installation
Installing a Murphy bed is about more than just adding a new piece of furniture. This highly functional addition does a phenomenal job of crafting a home that feels more comfortable and well-organized than ever.
Our love for wallbeds’ versatility is one of the many reasons we established Wilding Wallbeds. We provide homeowners with DIY kits, custom models, and pre-made beds so everyone can easily add these practical additions to their home.
Set yourself up for success. Use our installation resources to both prepare and install your Murphy bed the right way.